Organize Your Kitchen Cabinets & Drawers
Organizing Kitchen Cabinets & Drawers is a hard job
When you want to get organized in your kitchen, it can seem like a small job before you begin, but the reality is it is hard. Think about how much you have to do, and the difficulty becomes clear. The first question will be ‘where do I begin?’ We are going to show you the steps to quickly organize your cabinets and drawers so that your kitchen space is used more efficiently, making it easier to find everything when you need it, and importantly, keep it all organized in the future.
General Steps to Organize Kitchen Cabinets & Drawers
By following these simple steps, you can get rid of the clutter from your kitchen, sort all your kitchen items into groups and store them in a way that makes everything easy to find while keeping your kitchen neat and tidy.
-
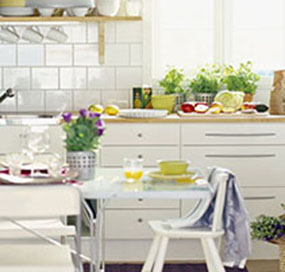
Step 1: Empty all Kitchen Cabinets and Drawers
![]()
Remove everything from every cabinet and drawer, and then put them all on a tabletop or work surface. By taking everything out, you can just how much stuff you have, and see the things you have never used, making it easier to make choices about what to keep and what to move on, whether donating or throwing out.
-
Step 2: Choose what you want to keep
Over time, we all fill our cabinets and drawers with all kinds of things, and a lot of them were used once, put away and forgotten, or bought and never used (yes, we all do that!). When organizing your kitchen, you have the opportunity to keep the things you use and get rid of all that stuff you don’t.
It’s an opportunity to donate or give things to friends or family, or for those you can’t find a new home for, recycle or throw out and declutter your kitchen as you reorganize.
-
Step 3: Clean Everything!
With all your cabinets and drawers empty, this is a great time to give everything a really good clean. Just use a mild soap and water mix and make sure you get into the corners of cabinets, as that is where spillages seem to collect.
Make sure everything is completely dry before you start refilling the shelves and drawers, and once dry, you can add in some shelf and drawer liners if you want to make things easier to clean in the future.
-
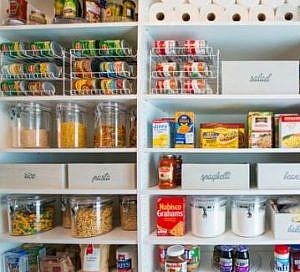
Step 4: Put your items into groups
The best way to organize everything is to have everything used for each task in one place. The first part of that is to think about your kitchen as a series of areas. Each area is dedicated to a task, so washing area, prepping area, baking area, cooking on the hob and so on.
Once you have your areas, then group all your items together that are used in each area. So, a prepping group, baking group, until all your items are groups for use. How you group things is persona, find a style that works for you.
-
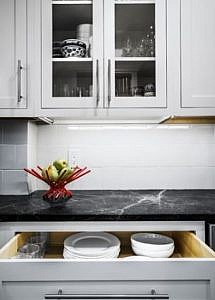
Step 5: Put everything close to where it is needed

Now you have your groups of items for each task, put them all close to where you are going to carry out that task. For food, this means the items you use most, such as breakfast cereal, in the easiest to reach place. If you are thinking of cutting down on snacking, a great trick is to put your snacks somewhere awkward to reach, just being out of sight can help with avoiding them.
If you wish, you can put temporary labels on the drawers and cupboards to help you get used to where everything is, and also help you change things a little if you find something doesn’t work for you later on.
-
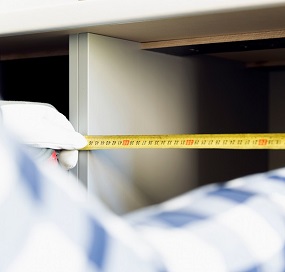
Step 6: It’s a good time to think about adding drawer and shelf organizers
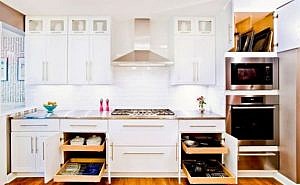
As you begin to put your groups of items back into appropriate places, you can add even more organization by also adding in a new drawer and shelf organizers. They keep everything in order, but they can also increase how much you can fit into a given space too.
They come in many styles, roll-out shelves in lower cupboards can let you see and access everything, even those items right at the back, without having to crawl on the floor, while baskets and other containers keep everything together, perfect for your groups, especially food items.
For cupboards without shelving, risers help you use all the space and fir more in, and drawer dividers work well to keep groups of cutlery and other utensils separate from each other.
-
Step 7: Put everything away
Finally, put everything you are keeping away according to your plan. However, don’t think you have to stick rigidly to your initial setup if you find that in use, some items are inconveniently placed, switch it up. Organization your kitchen is finding the best layout for you and how you use the space. You may find you need to adjust a few things along the way, but importantly, remember to stay organized, put everything back where you got it from afterward!
Tips and Tricks for Kitchen Organization
Now you have everything in your kitchen where you want it, here are some tips and tricks for adding that extra touch to make using that space even more enjoyable. From ways to keep your recipes within reach without taking up valuable worktop space to new ideas for storing your pot lids, these ideas will help you get the most out of any kitchen.
-
A Tablet Tray that stays out of the way
The first idea is a tablet tray. Great for keeping your tablet on view when you are following a recipe or video, but they take up valuable workspace. Instead, a tablet tray that is suspended from the bottom of your wall cabinets and folds up and away when not needed, provides a great alternative.
-
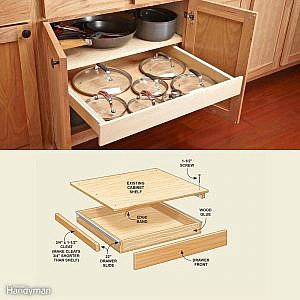
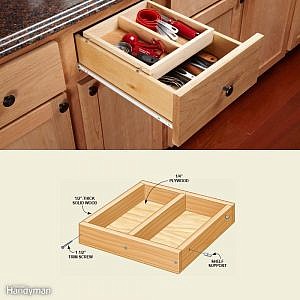
A lid drawer

Adding an extra drawer under a cupboard shelf is a great way to add space, you can make one yourself using drawer slides. By making a shallow drawer, you can have a home for your pot lids, without losing cupboard space at all. Best of all, with the lids in their own place, you can stack your pots and save even more space!
-
Adding to your drawer storage
If you Have deep drawers, there is often a lot of wasted space, if you fill it up, you end up spending ages trying to find anything inside, but there is a better way. A shallow, secondary drawer that sits inside the deep drawer and sits suspended from the drawer edge. This makes use of depth, without having everything piled on top of each other. If left removable, it can be used as a tool caddy for a specific task too.
-
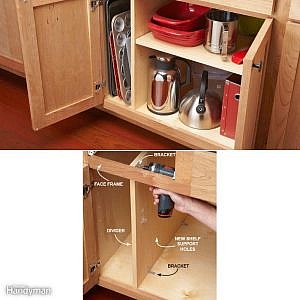
Add a Shel to any cupboard
You don’t have to stick to the number of shelves your cupboard came with, with shelf supports easily available, you can add another. Shelves don’t have to be evenly spaced either, why not create a narrow shelf to keep saucers and bowls, it saves a lot of space.
-
Rollout Storage
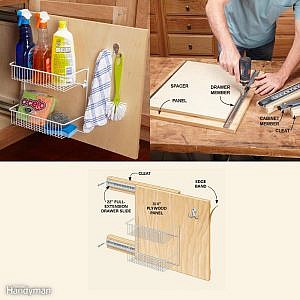
A slide-out panel can be mounted inside many cupboards without affecting the storage using a plywood panel and drawer slides. If you attach storage baskets, hooks, wire shelving or anything else you choose to the panel, you have slide out storage that lets you make use of the full depth of those lower cupboards without having to crawl inside them to reach anything,
-
Another way to store cutting boards
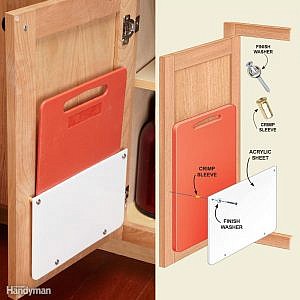
Cutting boards are thin and light, and another great way to store them out of sight uses rare earth magnets. Drill small holes in each corner of your cutting board and glue some small, rare earth magnets in them. If you then mount a metal sheet on the bottom of your wall cabinets, the cutting board will stick to that and stay out of sight when not in use.
-
A flip-down organizer
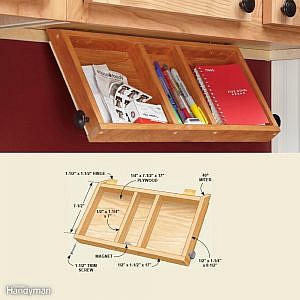
When following recipes, making noted, you always need paper and pens, but you don’t want to just leave them lying around your kitchen. You create a shelf for them with some wood and mount on hinges to the wall so it folds up into the wall cabinet when not in use. Magnets will keep it in the stored position.
Conclusion
No matter how big or small your kitchen is, having everything organized and to hand where you need it can turn food preparation from a chore to a pleasure. By using a step-by-step approach, you can break what is a large project into smaller, more manageable chunks.
That can help focus on each aspect of the reorganization, resulting in a better organized, more efficient kitchen layout that you will love.